Customizing Your Terminal
This post is all about looking good while coding in the terminal. By the end of it you should:
- Upgrade you terminal experience with a beautiful color scheme and a fancy theme with git integration
- Know how to set up a terminal and customize the look and feel
Prerequisites:
- Some experience in the command line or having reviewed this series
Apperance is Important
Change your Default Terminal Colors NOW!
The happier you are when you look at your terminal the happier you will be when coding. More Happy means more coding. More Coding means more practice. More practice means Great Coder!
This same principle applies for all text editors/IDEs (integrated developer environment) by the way. It sounds like a joke, but seriously, take some time to have a nice looking coding environment.
In order to change them, you should be able to create a default profile for most terminal emulators and change the color scheme, opacity, font, background image, etc.
Upgrade Your Terminal
Once you have spent some time in the terminal, you might want to consider upgrading your terminal. Here are few options for each OS. Then you get to the fun part, customization.
Mac
One really nice option is iTerm2, which you can install with your favorite package manager (e.g., brew install iterm2) or from their website. iTerm2 adds a lot of nice to have features over an above the stock terminal.
Alternatively, if you plan on switching back and forth between Mac and Linux or just want to give Linux a shot, there are a few terminal emulators, that work across both OSes. Some good examples, include kitty and alacritty (also works on Windows with WSL), of course both can be installed with a package manager as well or via their websites. The reason, it might be useful to use these is they have a configuration file, so once you set it up once, it will work identically across all the OSes. Of course, the downside is since you have to edit a file instead of using a GUI to configure, its a little harder for first timers to get something that they like.
Linux
The gnome-terminal and Konsole are satisfactory, but not ideal.
So, many people elect to download another terminal emulator that have more features, once they start using the terminal a lot.
Some common ones include alacritty and kitty.
Linux was built specifically with the terminal in mind, so you really cannot go wrong.
I would reccomend, you try a few out and see what suits your tastes/preferences.
But in general, the defaults ones use a GUI to adjust preferences and any one you download will use a config file.
Windows
For morst beginners to intermediate coders, I reccomend gitbash, which is designed to give you access to the unix commands and meant to help with git specifically.
The other option is Windows Subsystem for Linux (WSL), which is built by microsoft to allow you to directly use Linux from within your Windows machine. With WSL, you have access to a full Linux distro. One neat feature is you can have access to the alacritty terminal on Windows, so you could use it for all three OSes if you switch between them.
If this is your first time trying this out, I would stick to gitbash, but if you plan on doing a lot of coding in bash or you just want to see what all the Linux fuss is about, go for Windows Subsystem for Linux (WSL).
How to Customize Your Terminal
Each Terminal Emulator has its own method of configuring its preferences. Here I will show you the general struture for how to change them for each of the major types. Once you know how to configure the settings for your prefered terminal emulator you can skip to the section about some reccomended settings and continue following along with the tutorial.
GUI (iTerm2 / MacOS, Gnome, KDE Terminal)
Regardless of whether you choose the iTerm2 or any of the default MacOS/Linux Terminals, they all have the same customization structure.
First you need to open up the preferences.
Mac you need to access the apps preferences by either the keyboard shortcut (keyboard shortcut: ⌘ + ,) or by clicking the apps name in the title bar and then going to preferences.
For Gnome, you need to access preferences from the hamburger menu (☰) in the top right. On KDE-Plasma, you need to click Settings ➔ Condigure Konsole.
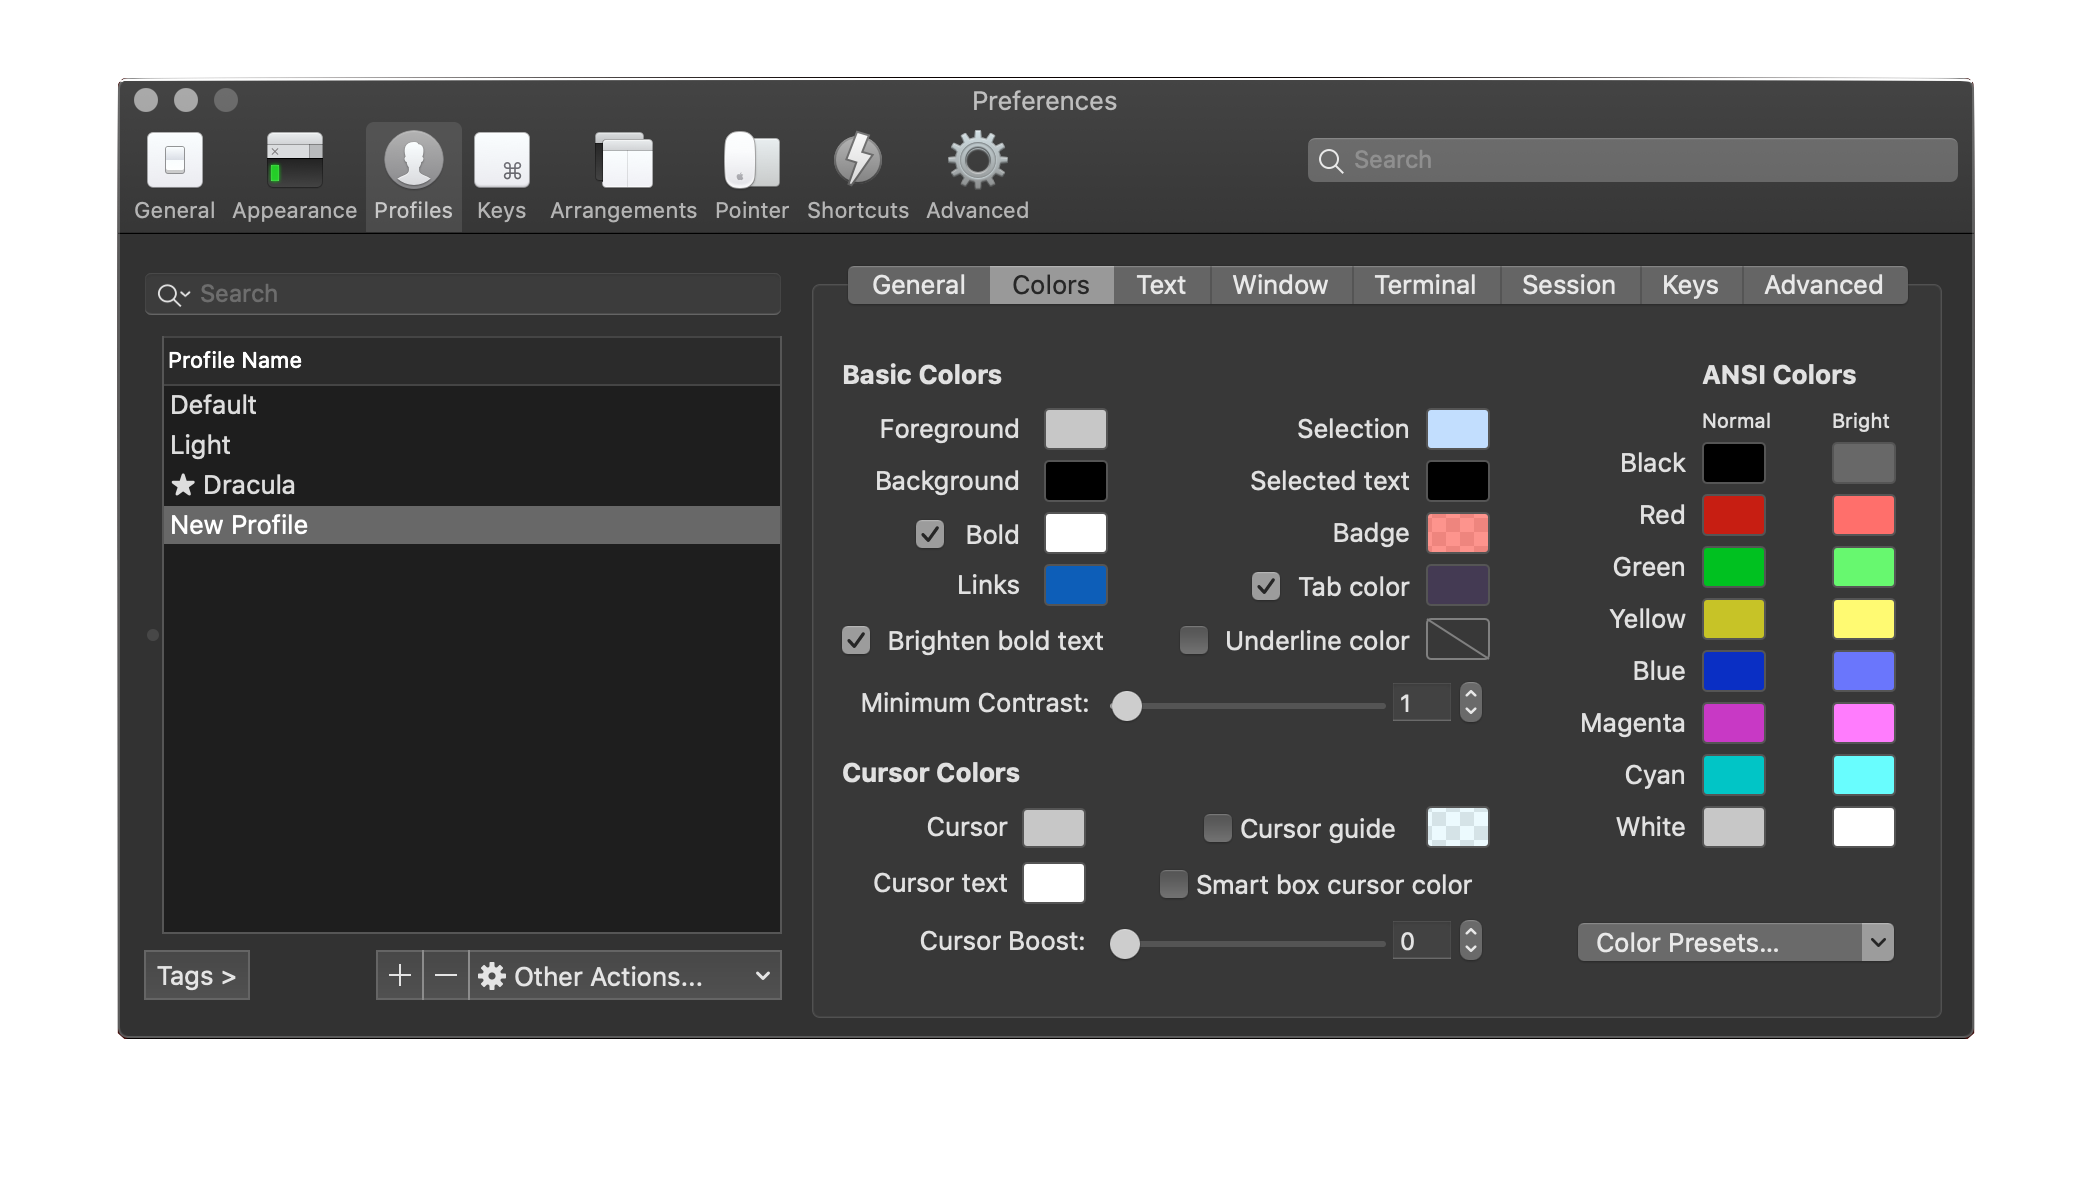
Once you have opened the preferences menu, it should look something like the image below. For brevity, I am only showing the iTerm2 Preferences panel, but they are quite similar in structure. Essentially, you just find the section on profiles and then head the color tab/subsection.
Now that you know how to customize the look and feel for your terminal, jump down to the general customization suggestions section.
Config File (Kitty and Alacritty)
For pretty much all terminals that use a config file, the easiest way is to use the sample, default config file as a start.
For most of them, they include all (if not most) of the defaults, and typically have a lot of comments to describe each section.
Here are the links for kitty sample config and alacritty sample config.
You will want to double check your specific apps config file location, but typically they go in the default home/xdg config directory.
For example, for kitty it would be in ~/.config/kitty/ directory and alacritty would be in ~/.config/alacritty/ directory.
From there, you have total and complete reign to edit your terminal however you see fit, thats sorta the draw with config file style preferences. You have total control to make something look absolutely amazing (or the power to make them look terrible 😂). But to give you some guidance, here are a bunch of nice themes you could implement for kitty themes and alacritty themes.
GitBash
As the name implies, gitbash only lets you use bash, so you do not have access to all the niceties for customization as zsh.
As such, you unfortunately, have a bit more complicated customization process.
It is a bit to much to explain in this simple blog post, so here is a good post to get you started.
You could try to use the Starship example below, but I do not know it that works or not for git-bash.
It does work with regular bash, but I have not specifically checked it out with git-bash
General Customization
Now that you know how to edit your terminal’s preferences, you can get to the real fun. Of course the easiest, and more common, thing to change is the colors, so I would start there. My suggestion is to look for a color palette/theme for your Terminal emulator and use that as a base, and then adjust those according to your own preferences. Especially when you are new to customization, it can be overwhelming to decide on all the color options, so having a starting place it very helpful.
It is important to note that there are tons of really great color themes available regardless of your Terminal Emulator, so I recommend doing a quick search with the name of your emulator and color theme.
I tend to use a custom modified version of the Dracula theme, so that might be a good place to explore (just search the app you want to add the theme to and then follow the instructions).
Another good theme is iceberg, which is a nice dark blue theme.
If you are still struggling to find a good theme that suits your preferences, you can also checkout this website, which list out the exact hex values for all the colors for different common themes.
Unfortunately, this is not something I can help to much with because its all a matter of personal preferences.
So, just open up your preferences and try some colors out, whether they are themes or your own custom colors!
The next section is where things get really exciting, you get to customize your command prompt!
As a reminder the command prompt is the information displayed before the command line (the part you can actually time into).
One that works really well across all the different shells is Starship.
But my personal preference is a combination of ohmyzsh and powerlevel10k, which as the name implies is specific to zsh users.
Starship
Once installed (with your favorite package maganger) or via the instructions specific to your OS, you can apply it to your shell with either eval "$(starship init bash)" or eval "$(starship init zsh)" depending on your shell.
Below is an example of what Starship looks by default:

As you can see, Starship offers great colors and nice git extensions to make it clear when you are in a git repo and specifically what branch you are in.
OhMyZsh and Powerlevel10k
Mac users can avoid this paragraph.
Unfortunately, this section of customization options only work on zsh.
Although many Linux distros have switched to zsh not all of them have, so make sure you are using zsh before using these customization options.
First check what shell you are using with echo $SHELL, if its says zsh, then you can skip this paragraph, otherwise continue.
To make zsh your default shell, first install zsh with your distros package manager, then running the following command to chang zsh to your default shell:
chsh -s $(which zsh)
Welcome back Mac peeps.
Now that everyone is back on the same page, we can begin with zsh specific customizations.
The first addon is called oh my zsh, which adds some amazing color theming and some general improvements.
Out of the box, your experience will already be much better than default.
It will add a bunch of aliases, to allow you to use shortcuts for some commands, as well as a plugin for git to allow you to know what branch you are using and the changes since last commit/push etc.

If you want to take this to the next level you can add the PowerLevels10k theme on top of oh my zsh to get really amazing looking prompt.
After you install the theme and restart your terminal, you will be prompted to go through a series of questions to perfectly tune powerlevel10k to your preferences.

For the best performance on powerlevel10k, you will need to install the preffered font (MeslsoLGS).
Of course this is not necessary, but I think it adds a lot when you are coding and you are enjoying what you are looking at.
For those that are interested, I will be uploading a post soon on how for my terminal setup for both MacOS and Linux.
And a link to it will be updated here (in the mean time you can check out my repo, which for those who can read code will already be able to apply it).
Customizing Your Commands
As you saw thOne of the biggest things you can to to improve your terminal experiences, is upgrade your functions. Basically all the standard command line utilities are decades old, and were developed before color was commonplace on monitors. To that end, there has been an attempt to update them to the modern age making them faster, more user friendly, and of course adding lots of colors and customization options. One great place to start is with Modern Unix. This is a repo that highlights a bunch of the most popular replacements.rough the tutorial, I have a lot more icons and colors compared to the default terminal experiences. Personally, I use several of these, but to get you started I would reccomend:
lsdorexato replacelsbatto replacecatzoxideto replacecdripgrepto replacegrep- and
tldrto replaceman
While on the topic of customizing commands, I should also meantion aliases. Aliases allow you to use shorthand for long commmands so you can be even faster at the terminal.
Aliases
Now that I have changed all my commands to the new modern version, I don’t want to mess up my mucsle memory for the old commands, so I make aliases to all of them.
For example, I make a alias for alias ls=lsd or alias bat=cat.
Additionally, there are lots of common long commands that you may want a shorter version for.
For example:
alias ll="ls -lha"alias g=gitalias ga="git add"alias gcm="git commit -m"
There are plenty more you can add as well, check out my post on aliases or my git repo of my aliases
Pywal
I would be remise, if I did not tell you about pywal. Pywal is a python tool that can take an image, like your wallpaper, and create a terminal color palete to match. This is super helpful to make nice cohesive color themes with your wallpaper and terminal, so its definitely something to check out.
Further Exploration
As you can imagine, you can go absolutely wild with customizing every last bit of your terminal, especially if you choose a terminal that has a config file. This post really just scratched the surface and if you want to get more into customization, you should check out the reddit thread r/unixporn. The name sounds a bit odd, but you don’t have to worry, its generally quite safe, its just people showing off how cool their unix based systems look after they have done all their customizations. They often leave config files, so they can be replicated! I do want to note that most will be using linux because you have way more customization options, which is a big selling point of Linux. But there are some for MacOS, so its not all doom and gloom for the apple fans. Below are a few examples of what you can find on r/unixporn (the last one in particular is pretty cool because they even customized their spotify colors to match their overall aesthetic):


You might notice that they typically have the apps in this tiled like format. I will throw one final plug, in that they did not do that by hand. Instead, they used a tiling window manager to organize all their open apps into a nice grid. Tiling window managers are amazing for looks, and offer a huge boost to productivity as well. So stay tuned for a future post about them and how to set them up.