Automating Tasks with Bash Scripts
In this post, you will learn how creating a script in bash as well as how to edit your PATH to allow you to run in from anywhere.
Specifically you will:
- Learn how to make a bash script (Setting a language with Shebang
#!; Changing permissionschmod) - Learn how to run a bash script
- Learn how to accept arguments and user inputs for your script
Prerequisites:
- Have read through the previous series on the basics of
bashor have a general understanding of how to move around edit files inbash
What are Scripts?
A script is just a series of commands put into a file so that you can run all of those commands at once. Scripts also allow you to read in arguments and even read in user inputs in the middle of the script.
To start off you need to create a file, feel free to use any of the command line text editors or your favorite IDE (some examples include: Visual Studio Code, Sublime Text, etc.); you typically want to avoid things like Notepad and TextEdit as they both can sometime add extra unwanted characters that can mess up scripts.
You can name it anything, but make sure it has the .sh extension (not requried, but helpful for beginners to know what files are shell scripts).
For our example, I will be naming the script my_first_script.sh.
Shebang #!
Once you open your file, on the first line you need to add a shebang #!.
Shebangs are use to indicate which interpreter the script should use.
In other words, which language should be used.
In the vast majority of cases you should use:
#!/usr/bin/env LANGUAGE
where language is replaced with the relevant language like bash zsh or python etc.
To make sure the script does something, we are going to use the echo function.
This will print text to the console.
In our case we will add echo "Hello from my first script" to the file.
So the full file should look like this:
#!/usr/bin/env bash

echo "Hello from first script"
Running the file should print “Hello from my first script” to the console. But how do you run a script.
Running Scripts
Now that we have our script ready its time to run it.
To do so we need to make sure it has the proper permissions.
Lets check the permissions with ls -lh:

Focus on the text on the left, specifically the rw-r--r--.
This is telling you about the permissions for the file you are reading.
They are repeated three times, the first set is for the owner of the file (since you made the file that’s you), the second is for the user’s group (beyond the scope of this post), and the final section is for any user on the computer.
They stand for read r, write w, and execute x permissions.
As you might have guessed, the read permissions means those users can read the file, while write permissions means they can edit the file.
Execute permissions means you can run it as a script.
Notice currently, we do not have x permissions, so we need to give the file the permission to be run before it will work.
For more information on permissions, you can check out this post.
We can do this with the chmod command.
The chmod command changes the file’s permission based on the options you select.
You can either use chmod 755 file_name or chmod +x file_name.
The first one specifically assigns read, write and execute permissions for the owner; and assigns read and execute for all other users.
The second one, specifically, just adds execution permissions to all users.
When you run this command, you probably will see and error.

This is because you need permission to change the files execution status.
This is just like how you are asked to type in your admin password when installing a new application.
To do that on the command-line, you need the sudo command.
Super User (sudo)
sudo stands for Super User DO.
The super user is a special all-powerful user on your computer.
Anything the superuser says to happen will happen (so be careful when allowing apps to have super user previledges).
When you run a command with sudo escalation/priveledges you will also need to type in your password.
If you setup your user account to have admin rights, then you will also be able to use sudo.
On the other hand if you don’t have admin rights / your company or university set up your computer, you might need to ask them to give you sudo priveledges (but its worth trying this command first, because they might have given you priveledges anyways).
When you type in your password in the command-line you should know that it will not show you typing anything. This is normal and is designed to improve security, but it can be confusing for first time users. So just type your password as normal. If you make a mistake, you can always press backspace a bunch of times and type again.
Now you can combo the sudo command with the chomod command.
One neat trick, is you can actually type
sudo !!to say rerun the previously typed command but now with sudo priveledges.

As you can see, now we finally have execute permission on this file.
In order to actually run the file, all we need to do is type ./file_name.
The . means specifically check the current folder because that is not the default place your computer will look for commands (more on that in this post).
And since we included the shebang it will run the script in the correct language.
Here is what is looks like:

Now that we got that whole process working, we can run the script anytime as long as we are in the correct working directory or specify how to get there (e.g., path/to/dir/script.sh).
Luckily, we only have to do that process once, now that is has the proper permissions, it will stay that way!
Now we can get to adding more functionality to our script with variables.
What is a Variable?
A variable is a part of your script that can change either from user input or from other parts of your script. Variables are a foundational part of any programmers toolkit because they allow you to write code that is adaptable to the use case instead of having to know all of the details before the project starts. When defining a variable in your script, you will need to know a few things. To define a variable, you need to use the following structure:
VARIABLE_NAME=VALUE
Importantly, there should be no spaces before and after the =.
Once you have a variable stored, you can use it anywhere in the script.
You can access the variable with the either $VARIABLE_NAME or ${VARIABLE_NAME}.
Now, let’s update our script to include a variable:
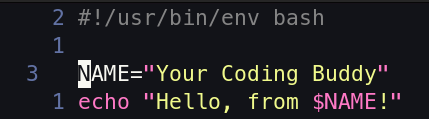
Take note of the quotes in the script, I purposefully put double " instead of single ' because in bash, stuff instead double quotes " will be automatically expanded with any variables you include.
In contrast, single quotes ' will report back exactly what you include and will not interpret any variables inside them.
Here, is the output of the updated script:

Look at the output.
It replaced $NAME with the actual text we wrote.
As you can imagine, variables are super helpful because you often want the same information passed across the whole script, and it would be a waste to retype it multiple times.
But what if you want people who use your script to type their own name and not have to edit the file?
For that we have input arguments.
Arguments
We have seen several previous commands that have arguments (for some examples check out this series), well now its time to add them to our own script!
All arguments appended to the end of a command can be accessed with$NUMBER, where the number corresponds to the order they were entered into the command-line.
So, the $1 is the first argument $2 is the second and so on.
Let’s make this clear with an example.
Edit your script to look like this:
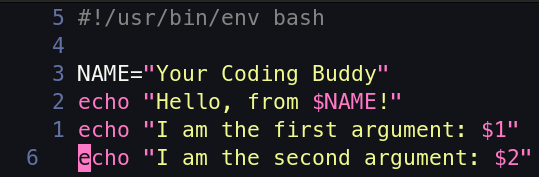
Running the updated file with arguments (1 and TWO) will give you this output:

As you can see, the integer 1 was the first argument passed and was replaced anywhere I had $1.
Similarly, the word TWO was the second argument passed and was replaced anywhere the script had $2.
Some notable other default arguments:
$0will give you the the path and filename for the script that is running$@will list out all the arguments included from the command-line
Arguments are a way to allow users to alter your functions without needing to edit the file itself. For more information of bash arguments and adding options to scripts see this post. But what if your user doesn’t know how to use the command line and you still want them to be able to use your app. Well for those situations you can read in user inputs.
Reading User Inputs
Allowing for input arguments are useful, but they require the user to know in advance what needs to go where and in what order.
Alternatively, you could use the read command to read the input from the user.
Let’s take a look with another example.
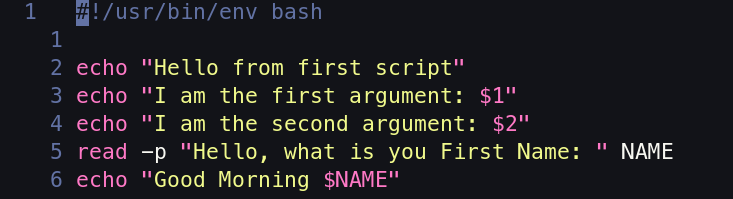
I removed the first NAME line and appended following lines to the script:
read -p "Hello, what is your First Name:" NAME
echo "Good Morning $NAME"
Here is the full updated script:
The new read line uses the -p option to Prompt the user with following text and stores whatever they type in a variable called NAME.
Then, on the final line, I print out Good Morning and the name that the user previously typed in.
As you can imagine this is incredibly powerful because your scripts can now perform slightly different actions depending on how the user responds.
Tips For Organizing Your Variables
Here, I am just going to spell out some good practices with variables. When defining a variable in your script you will need to know a few things. Typically, you want to always create/assign all your variables at the top of your script. There are some exceptions (e.g., its specific to a function, or the output of another command), but in general, you should try to stick to this rule. It helps make your code much more readable and editable in the future so its good to get in the habit early.
Another tip is if you assign it once, its set at the top of the file (e.g., not the output of a function), and don’t expect it to ever change, then you typically use all caps (using underscores instead of dashes). In contrast, if its a variable that you expect to change a few times or only lives inside a fucntion, then it should be lower case. This is not set in stone, but again its a good practice to have in all languages. For more best tips on general good practices, I will be making a guide in the future, but until then you can check out Google’s Shell Style Guide.
Extra Practice
Its really important that I harp on this point.
The only way you will improve at coding is by actually attempting to code.
I am giving some examples for you to follow along, but even better would be for you to adapt them to your needs or, better yet, come up with a project on your own.
At this point, you might still feel like you don’t know enough to start, but that is NOT true.
If you have completed this post as well as the bash basics series, you have learned a lot to this point, so make sure you try things out.
If you get stuck that is ok, you can always search for additional things or check out the next few posts to gain more skills.
If you have been following along, in a previous post, added a few lines of code to a file, so you could make a template folder to stay organized.
Well now, its time to adapt that into a script, so you 1) don’t have to copy and paste the commands and 2) can use arguments or user inputs to determine the main project name instead of having it be template or something similar.
For those that did now catch that post, I have copied the project description below.
For this example, I want you to make a script to set up a new project directory.
The script should take in either an input argument and/or read in user input to create a standard folder structure for a new project.
Below you will see a sample one, but feel free to adjust it to your needs.
For extra practice, try to have the main directories name be based on a user input or argument and include a some text in the README.md file.
Inside the newly created folder you should you should have a the following structure:
my_first_bash_script/  # Ideally based on a variable: either argument or user input
  |-- analyses/
      |-- plots/
  |-- expriment/
      |-- data/
  |-- lit_review/
  |-- supporting_docs/
      |-- scales/
      |-- irb_docs/
  |-- DEVELOPEMENT_DECISIONS.md
  |-- README.md
Feel free to mess around with this structure a bit to suit your own needs, but having some basic structure for all projects is very important.
For scientific and software project folders, I highly, highly reccommend two separate .md files.
The README is for anyone first coming to the project on how/why to run this code and what is found where (this should be updated as you continue developing the project).
In contrast, the DEVELOPMENT file is a place where you should write down every decision you made for the project.
Why did you use this library/framework instead of that one.
Why did you did you select these particular values etc.
Personally, I also leave a ton of links to stackexchange/stackoverflow for how I came up with code or to justify certain things to myself.
If you haven’t worked with md files also know as markdown files, check out my previous post on them.
Recap
You learned so much in this post!
First you learned how to make a script including the importance of a the shebang and how to change the scripts permissions.
Additionally, you learn how to incorporate variables into your scripts and how to allow users to change those variables.
And finally, you put that all together to create a script to make template project folder for all your future projects.
One thing you might have noticed its we still needed to use SCRIPT_PATH/script-name syntax to run the script.
Well, in the next post you will learn to to set your PATH, so you can run a script from anywhere without specifying the scripts path.